Powered by Blogger.
RSS

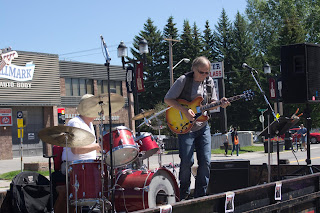
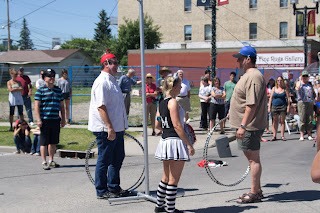
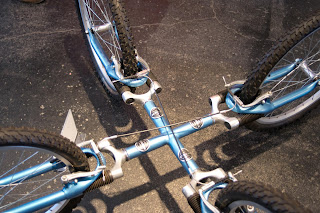
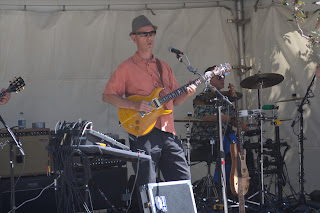
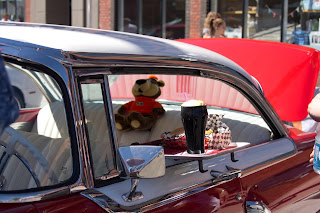
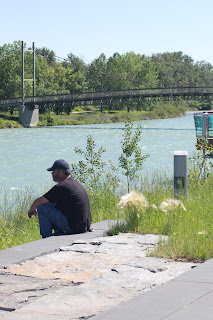
16 Street Pictures of The Inglewood SunFest


Clip to Evernote

  • Digg
  • Del.icio.us
  • StumbleUpon
  • Reddit
  • RSS

500px

  • Digg
  • Del.icio.us
  • StumbleUpon
  • Reddit
  • RSS

Aperture - How W I D E

Okay, now that we've talked about the camera specification I thought it might be time start getting into making pictures.  Now anyone can TAKE a picture.  Simply put the camera up to your eye and press the shutter release button.  Click and you have a picture.  And a lot of times a camera in AUTO mode is going to do an okay job.  And to be honest with you I almost always leave my camera in AUTO mode so I can take that quick picture when I need to.


Using AUTO mode is a lot like having an expensive point and shoot pocket camera.  I don't know about you, but I didn't buy a DSLR to take point and shoot pictures.  I bought my DSLR so that one day I might be able to make pictures of National Geographic or Sports Illustrated quality.


One of the most important aspects of a photograph is how much light is let into the camera.  Too much light and the picture is so bright it almost looks white.  Not enough light and the pictures are very dark, almost black sometimes.  Much in the same way your eyes are when we go into a very bright room or a very dark room.  A big differences is the eyes are able to react a lot better than the camera does.


When we go from normal light in to a very bright room the pupils (the black centre part of the eye) gets a lot smaller so that less light enters the eyes.  When we go into a dark room the pupils gets larger, to let more light into our eyes.  What a cool idea.  If only there was something like that on a camera.


But, there is.  And it's called the Aperture.  Defined on dictionary.com as '1 an opening, as a hole - 2 in optics an opening, usually circular, that limits the quantity of light that can enter an optical instrument' (such as a camera) Why would you want to limit the amount of light entering the camera you might ask?  Don't you want as much light as possible?  The answer, like many answers in photography, depends.  It depends on what you are trying to do.  Yes, if you are making pictures in low light you most likely will want to let in as much light as possible.  Allowing the same of light in on a very sunny day will most likely over expose the picture so much that you may not be able to see anything at all.


Before getting into the details of aperture and its whens and whys it might be a good idea to take a look at just what 'letting more light in' looks like.  I've taken several photos of an old 50mm lens with a manual aperture ring. 


f 2
f 8

f 22

(I had to use an older lens because the aperture on newer lenses are controlled by the camera body)


As you can see the smaller the opening the larger the number.  Please don't ask me why, kind of seems backward to me.


Okay.  Lots of light, big f stop number.  Low light, small f stop number.  Great, got it.  Nothing more to worry about right?  Wrong.


The 'AUTO' mode on most cameras can get the f stop correct for bright or dark shots, most of the time.  The other thing the aperture has a HUGE effect on is the how much of the picture is in focus.  What I mean by that is when you'er making a picture of a person's face (portrait) you want the persons face to be in focus.  Do you want or need everything in the background to be in focus?  Assuming you don't want the background in focus simply open that f stop as wide as it will go (Smaller number).  Ideally for a portrait you would want to use an f 2.? or even an f 1.? if your camera will go that low (open).  The smaller the f stop number the shallower the depth of field.   Going the other way if you want as much of the picture in focus as possible you want to close down that aperture as much as possible.  Closing the aperture gives a much deeper depth of field.  Deeper depth of field means a larger f stop number.  In the f 20 or f 22 range or even deeper if your lens will allow it.
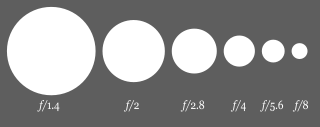

f stop chart

I've added an f stop chart as a guide, and please remember not all lens will have the full range of f stops.

This post only really scratches the service of aperture, f stops and depth of field.  I will talk more about all three things in the future.  In fact, aperture and depth of field is something you will hear a lot about in all aspects of photography.  That's why I want to touch on it sooner rather than later


Clip to Evernote

  • Digg
  • Del.icio.us
  • StumbleUpon
  • Reddit
  • RSS

Lens - Through the Looking Glass

Anybody that owns a DSLR has looked at a website like Henry’s or B&H Photo and browsed through page after page of lens and thought ‘Wow, where do I start?’ And its understand why there are so many questions when it comes to buying a new lens.  (Well at least new to you, even if it was previously enjoyed by someone else.)

Where to start when trying to decide on a new lens?  Macro?  Fish Eye?  Zoom?  What the heck is prime?  And are other lens non prime?  Like almost everything else with photography it really depends on what you want to do with the lens.  Yea, I can hear you saying ‘I want to make pictures with it, duh!’  Of course you want to make pictures with it, but what type of pictures?

ZOOOOOOOOOOOOOM


28 mm
55 mm
200 mm
I guess the first one to talk about, and I’m sure the most common type of lens is the zoom lens.  What is a zoom lens?  The easy way to type it is; A zoom lens is a mechanical assembly of lens elements for which the focal length can be varied.  By chancing the focal length of the lens you also change the angle of view for that lens.  As the old saying goes a picture is worth a thousands words.  So here are three pictures (does that equal three thousand words).  All three pictures where taken standing in the exact some spot in the middle of the street in front of my house (glad I live on a quite street).  The first picture was made at a focal length of 28mm (the widest this particular lens goes). The second picture is 55mm (the maximum zoom of most kit lens) and the third picture is at 200mm (the maximum zoom for this particular lens).  As you can see in the pictures with the wider angle the field of view is much wider and the more one zooms the more of a close up you get.

W I D E angle

55 mm


35 mm


18 mm
A wide angle lens is a lens whose focal length is less then the focal length of a ‘normal’ lens.  What in the world does THAT mean?  Again, a picture is worth a thousands words (so three pictures should be worth three words).  Again all three pictures are of the same scene, this time I’m using bottles on the bar in my basement.   As you can see in the three pictures it APPEARS that the bottle move further apart the wider the angle used on the lens.  Trust me when i say that the bottles never moved.  (I didn’t have THAT much to drink that day).  The distortion effect a wide angle lens offers can be a lot of fun to play around with.  One day I’d like to get an even wider lens.

Prime Lens

Defining a prime lens is really very easy.  A prime lens has a fixed focal length, or in other words does not zoom.  There, enough said.  Whats that?  Why would someone buy a lens that only has one focal length and there for is not a versatile as a zoom lens.  In a word.  Quality.  Prime lens often offer superior optical quality, lighter weight, smaller size and lower price.  With fewer moving parts then a zoom lens, prime lens usually have a larger aperture then a zoom lens. (More on aperture in a future post).  Common prime focal length are 20mm, 24mm, 28mm, 35mm, 50mm, 85mm, 105mm, 135mm, 200mm, 300mm, 400mm and 600mm.

Macro Lens


A macro lens is designed for close up pictures of very small objects.  There are several different  styles of macro lens.  Some zoom lens come with a macro setting allowing for close up shots as well as far away shots (not at the same time).  Another way of archiving the macro effect is with either extension tubes or bellows, thus moving the lens elements further away from the CCD sensor.  Macro is something I hope to post about more in the future, once I've had a chance to play around with it some.

Fisheye Lens


A fisheye lens is a very wide angle type lens that takes in a broad panoramic image.  First developed to study cloud formations the fisheye lens quickly became popular with photographers for their uniquely distorted appearance.  This is not an effect that I personally am a fan of, but for the sake of this blog hope to spend more time with in the future.


Each type of lens that I have talked about really dissever there own post, and will get one in the near future.  This is intended as a brief over few.  There are other types of specialty lens as well that i may or may not talk about down the road.

What lens do you think you'll get next?

  • Digg
  • Del.icio.us
  • StumbleUpon
  • Reddit
  • RSS

Camera Specification

Before getting to deep into the hows and whys of photography I thought it might be a good idea to get a better idea of what all those camera specification the salesman was spurting off when you bought your camera. (Or all the numbers and letters listed on the websites)

Where should we start?  And what numbers can we ignore?

Zoom Zoom

Well.  The first one I’d like to talk about is ZOOM and difference between optical zoom and digital zoom.  I’m talking about this one first so I can get it out of the way.  Simple put, if you are interested in ‘point and shoot’ type of camera you want a much optical zoom as possible and as little digital zoom as possible.  Why?  Digital zoom is basically an other name for cropping.  I can’t think of any photo editing software that doesn’t crop pictures.  Why pay for something that is just going to lower your picture quality?  With optical zoom on a ‘point and shoot’ the lens elements are adjusted which in turn the adjusts the focal length of the lens (and thus the angle of view).  This is the same process used in not only ‘point and shoot camera’, but in some binoculars, microscopes, telescopes, telescopic sights and other optical instruments.  Stick with the optical zoom and try not to use digital zoom if the camera you already have has it.

As all zoom lens on DSLR (Digital Single Lens Reflex) are optical type zoom lenses i doubt this will be something that will get much discussion in the future.  That being said, if someone down the road does have a question regarding this I will be more then happy to go over it again.

Magapixels

When it comes to zoom lens for DSLR cameras and DSLR lens in general there are so many options that I think I’ll do DSLR lens as a separate post in the near future.

Usually the first thing one looks at when buying a new camera is the number of mega-pixels.  Well, I’ve already done a post on mega-pixels and when they mean so I don’t want to do all that typing over again.  So instead I’ll just link to the older post.

Shutter Speed

In my mind the next thing you want to look at is shutter speed, or more correctly fastest shutter speed.  If a camera doesn’t have a fast enough shutter you might miss out of on things like fast movement.  Things like moving cars, sports action, your pet dog and even children can come out as nothing more then colourful blurs on the screen or paper.  Also slow shutter speed can produce over exposure in bright light or on a sunny day.  If the shutter isn’t slow enough you can miss out on a lot of low light shots as well.  A slow shutter can also allows for some very interesting effects that we will talk about more in future blog posts.  Another fun shutter speed is called ‘bulb’ or on some cameras simply ‘B’.  This allows the user to manually open and close the shutter allowing for very long exposures, lasting minutes or even hours.  Great for very low light photos.  Most, if not all, DSLRs include bulb mode.  A good range of shutter speeds to look for in a DSLR is from about 30 seconds up to about 1/8000 of a second.

Lens

Kit lens?  Yes it would be great if that new camera you are thinking about buying came with a lens, but not all do.  If you are buying your first DSLR camera don’t worry, MOST entry level cameras do come with a kit lens of some sort.  Most kit lens come in the 18mm to 55mm range.  (We’ll talk more about lens and what there numbers mean in a future post).  If your upgrading your camera say from an entry level camera to to something a little further up the food chain you most likely already a  selection of lens, so why pay extra for a lower quality lens.  One thing to remember about lens when upgrading, make sure that your old lens will work with your new camera body.  Case in point, Nikon lens only work with Nikon Cameras, Pentax lens only work with Pentax cameras.  Also remember that some older film camera era lens might not work with newer digital cameras.  If your not sure take some of your lens with you to try with the new camera body you are thinking of buying.

As kit lens are sort of a ‘gift with purchase’ type thing they tend not to be of the greatest quality.  Even if you are considering an entry level camera body you might want to consider buying a better general purpose lens to go with it, if your budget allows for it.  If not don’t worry the kit lens is still going to let you make better pictures then you would with a point and shoot camera or the camera in your smart phone.  I know when I bought my second DSLR body I didn’t bother with a kit lens as it was a similar lens that came with my first DSLR and I already had several lens that not only worked well with the first DSLR but the newer one as well.

Feel

To me an other very important thing to think about when buying an new DSLR is how it feels.  Yes this is not really a specification and there is know way of measuring this, but do keep it in mind when deciding on a camera.

The camera has to feel ‘right’ in YOUR hands.  We all have different size hands, some people of big meaty hands well other have smaller hands.  Some of long fingers and some of short ones.  You need to hold the camera in your own hands.  You also need to check where all the important buttons are, the ones you might want to use with out taking your eye from the view finder.  If buttons and controls are in places that are hard to reach or out of the way they might be more difficult to use.  

Also, check out the menus on the camera. I’m not suggesting that you try to memorize them or anything like that.  But it is a good idea to make sure you can get to anything you might want to adjust in the field, so to speak, can be found quickly.  

Here it comes again.  I will be doing a post in the future talking more about camera buttons and menus.  Well maybe two posts.

Hope this was helpful in understanding your camera and/or your next camera a little better.

  • Digg
  • Del.icio.us
  • StumbleUpon
  • Reddit
  • RSS

MegaPixel...whats a MEGAPIXEL


MegaPixels
How many do I need? Do I have enough? What is a MegaPixel?
And no they are not really big pixels.
These are all very common questions fro anyone buying there first digital camera, and even common for people who already have a camera.
I think before we talk about how many we need its important to understand what it is we are talk about. What is a megapixel?
Well, I've always described it by saying 'a picture is made up of a series of dots also called pixels' and that 'a 1000 pixels is 1 megapixel'. Dictionary.com defines pixel as 'the smallest element of an image that can be individually processed in a video display system'. Basically the same thing, I just think mine is a little easier to understand. (But I might be a little bias)
Okay, great, now we know what a pixel is, and that 1,000,000 make a megapixel. How does this help? What does it mean?
I think for most people understand that the more pixels the better your picture is going to look. A picture with one pixel is not going to should any detail at all. A picture with a 1000 pixels is going to have a lot more detail. You would easily be able to define shapes and colours. (Canadian spelling again.) A wallet size photo with 1 magapixel would look great. the problems start when you want to make that wallet size picture into a 4 x 6, or 5 x 7 or even larger. As you increase the size of the picture the number of pixels doesn't change. The only thing that changes is the size of the pixels. Those nice little pixels in the wallet size photo that gave nice sharp edges (assuming the photo was well sharp and well focused to start with) are now a lot bigger. The sharp lines of the smaller size photo are not rough and jagged and no longer smooth.
So, to really answer the question of how many megapixels are need, you first need to ask your self. 'Self, what are you planning on using these pictures for?'

Well.  If all you plan on EVER doing with your picture is posting it online on something like FACEBOOK or a blog then you don't need anything more the 2 megapixels. (Yes, I know that even the lowest price camera start at around 5 megapixels)  For a 4 X 6 (the most common picture size) you would want at least a 4 megapixel camera, maybe even a 5 megapixel.  So yes, most pictures coming from a 'cheap' or 'older' digital camera or even most cell phones or smart phones should look okay for the most situations.


I can hear you saying to yourself 'but sometimes I might want to print a picture bigger then 4 X 6'.


Not to worry you are in luck.  With out going through all the different sizes I will talk about maybe the most common portrait is 8 X 10.  Most 8 megapixel cameras should be able to produce pictures suitable for 8 X 10 prints.  Although you might want to error on the side of caution and use a 10 megapixel.


If you would like to check the number of megapixels need for other size of pictures check out this chart that I've 'borrowed' from design215.com 

So i guess what I'm trying to say here is that don't get caught up in the megapixel numbers.  Yes, moving from a 4 megapixel to 10 megapixel will make a difference in the size you can print your pictures and still have them look good.  Will you notice the same difference going from 10 megapixels to 16?  Well, you might not notice as big as a difference, unless you are printing very large pictures.

I personally own a 6.1 megapixel and a 12.4 megapixel camera.  No, I am not able to notice a diffrence when posting on facebook.  When printing 16 X 20, or even 8 X 10, yes, there is a noticeable difference.


  • Digg
  • Del.icio.us
  • StumbleUpon
  • Reddit
  • RSS

Whale Watching In Puerto Vallarta


As you read this I'd like to point out that in no way am I trying to compare my self to any professional photographer or trying to say that I'm just as good.
I'm sure we've all seen pictures like this one that seem to be snapped at just the right time, from just the right location. I know I have and I'm always asking my self 'how did he (or she) do that. As the person who got lucky with this whale photo made in February 2011 in the Bay of Puerto Vallarta I know that its a lot more then luck.
The thing I think a lot of us forget when we are looking through the glossy pages of a magazine like National Geographic or Outdoor Photography is that for every picture we see printed in the magazine several hundred if not more photos are taken. I know for myself I made almost 200 photos on one 3 hour boat ride. That means a lot of empty water.A few splashes. A lotof tales. And a lot of whale backs. (Know I know why they are called Humpback Whales)
Just the fact I was able to get on the boat that morning at all still amazes me. The day before I had been as sick as can be. I'm not sure if it was something I ate or being out in the sun all day or something I drank. Or a combination of all three. Late in the afternoon I was not feeling well at all. On a first name bases with the toilet you could say. Heck I was so sick I even missed dinner and I’m not one to pass up good food. Even the next morning I still wasn't feeling great, to the point where I as back chatting with the toilet. I didn't dare have breakfast that morning, but there was no way I was missing that boat. Even felt queasy at the start of the trip.
I'm so glad I didn't give up. The trip was only about 3 hours and I had the camera front of my face most of the time. (Partly so I could snap pics and partly so know one could see how green I was.) The end result was a picture that I am very proud to hang on my wall, twice. I have it as a 8 x 10 in my upper hallway and as a 16 X 20 canvas from 44 Wide in my living room, above my fish tank. (Think it makes my little guppies jealous.)
The whole trip was great, from the time the left Calgary aboard WestJet until we got back to cold and snowy Calgary.  But by far the best time was the 3 or so hours on the whale watching cruse.  Whether you get to Mexico or not, always have your camera ready.National Geographic

  • Digg
  • Del.icio.us
  • StumbleUpon
  • Reddit
  • RSS

We're Having a Heat Wave

With most of North America experiencing extreme heat conditions for much of the summer I thought I'd take this time to remind ever one.

WINTER IS COMING!


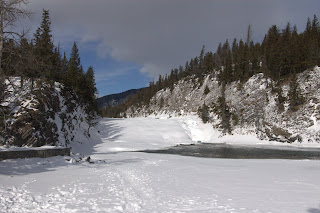
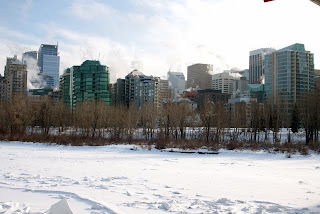
And until that happens, here are some wither pictures to remind as all of just how cold it can get.


Banff National Park, Alberta, Canada

My backyard.
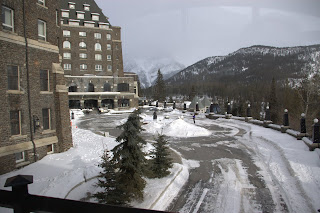


Calgary, Alberta, Canada
NOT Photoshopped

We now return you to summer.  Enjoy the heat!


  • Digg
  • Del.icio.us
  • StumbleUpon
  • Reddit
  • RSS